Calibration Failed Check the Axis Again Prusa
-
-
Place a sheet of paper on your heated bed. Remove whatsoever residual filament coming out of the nozzle.
-
Eye your extruder on the X axis. Move it down by rotating both the Z lead screws at the same fourth dimension. Move the extruder down until the nozzle is just touching the newspaper.
-
Stop when the nozzle is just touching the paper.
-
Place the middle section of a nada necktie under the Pinda.
-
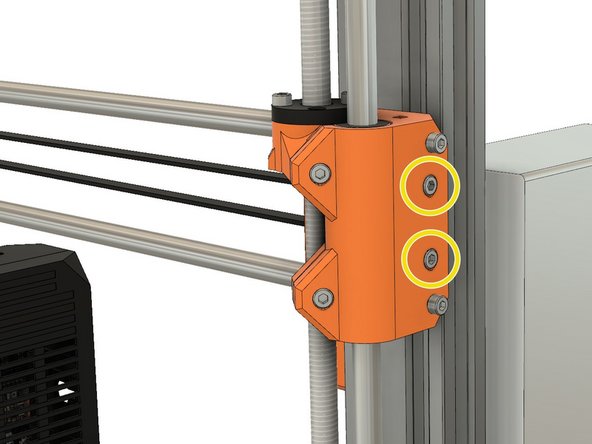
Loosen the M3x10 spiral and gently move the PINDA downward until it is touching the zip tie.
-
Tighten the M3x10 screw to secure the PINDA in place.
-
-
-
Plugin and turn on the printer.
-
Using the screen menu, motion the X centrality up until it crashes in to the Z tops. The stepper motors will skip. making a dissonance - this will not damage the motors.
-
Using the screen menu, move the X axis downwards until the nozzle is approximately x-15mm from the heated bed.
-
-
-
If you accept applied tension to the belt, unscrew the belt tensioner on x_end_idler until the belt is relaxed.
-
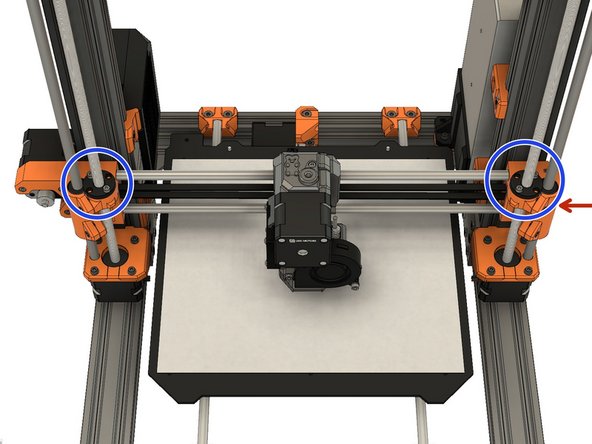
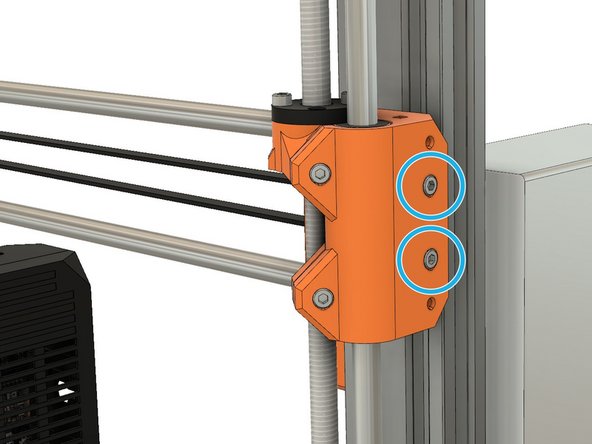
Loosen the screws which secure the trapezoidal nuts. This is to ensure that the Trapezoidal nuts 'cocky-centre' on the lead screws.
-
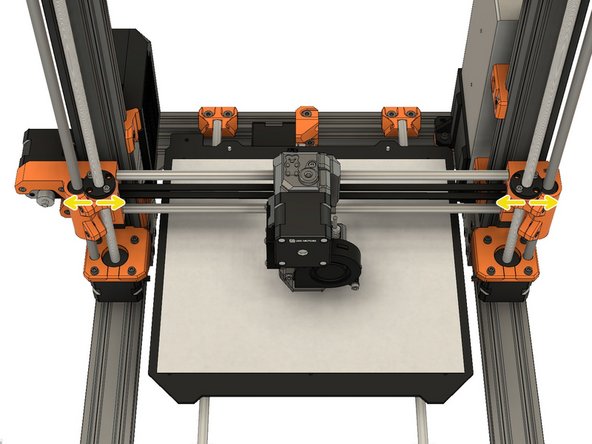
Brand sure the trapezoidal basics are moving freely.
-
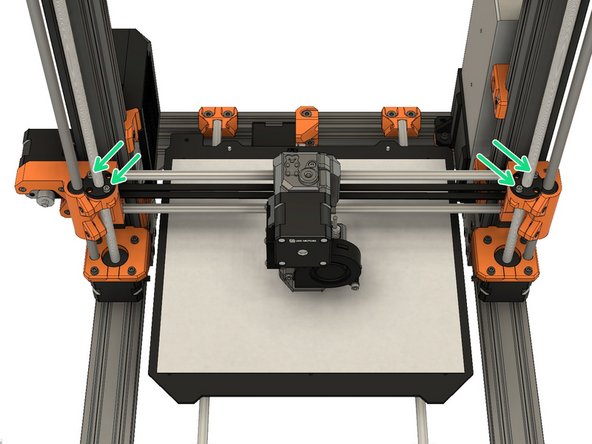
Tighten the iv screws alternately (on both sides). Don't apply whatever lateral force on the trapezoidal nuts.
-
-
-
Motility the X axis to the middle of the Z axis and shutdown the printer.
-
Tighten the chugalug until the belt is straight and doesn't sag. Don't tighten too much, you should yet be able to pinch the chugalug with very little force strength.
-
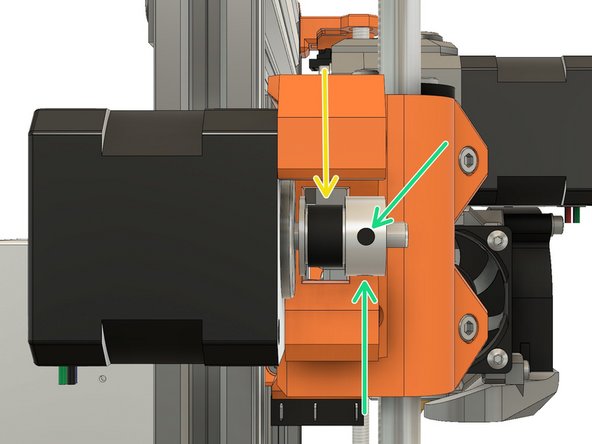
Loosen the 2 pulley set screws a petty.
-
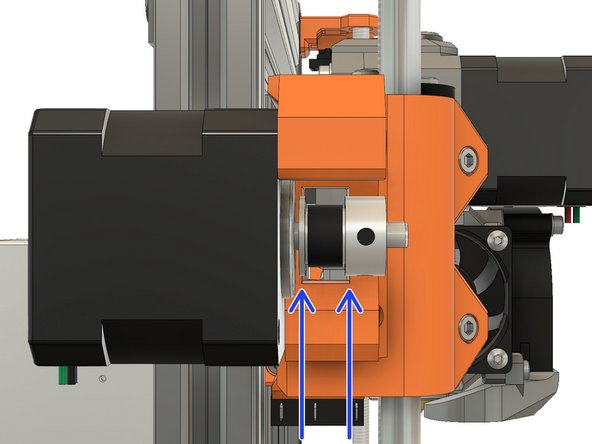
Arrange position of the pulley to take the belt centred. You can move the extruder by mitt, to the left and correct, to verify that the chugalug is centred.
-
Tighten the set screws alternately.
-
Verify that the belt is not touching the x_end_motor and that the drive pulley is non touching the X motor.
-
-
-
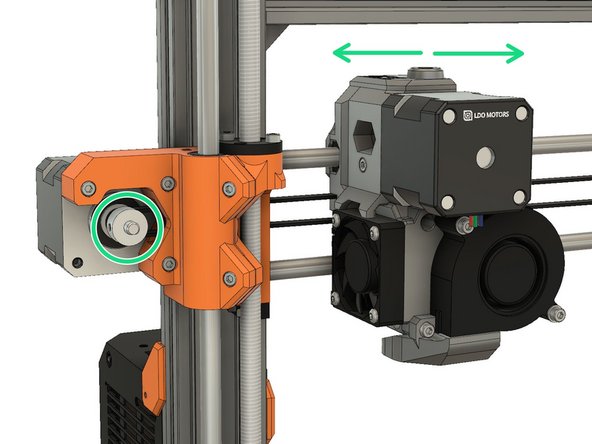
Grip the X motor shaft with pliers to prevent it moving (catch the flat side of the shaft). Tension the belt, by tightening the screws in the x_end_idler. Do this while trying to move the extruder to the left or right. The belt should stay straight and should not bow upwards and skip over the drive pulley teeth.
-
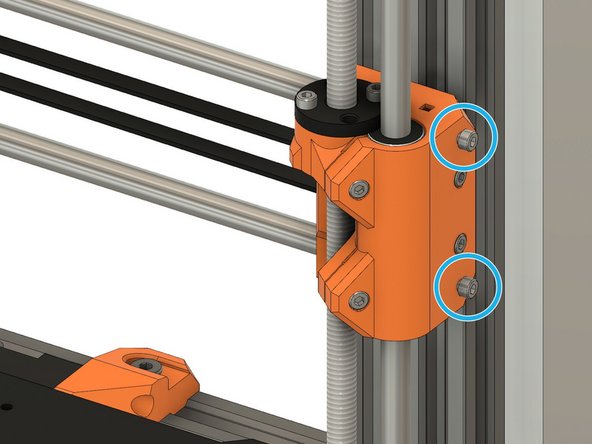
Thread two M3x10 screws in the x_end_idler. Don't tighten them fully yet, it will be done on the adjacent footstep.
-
-
-
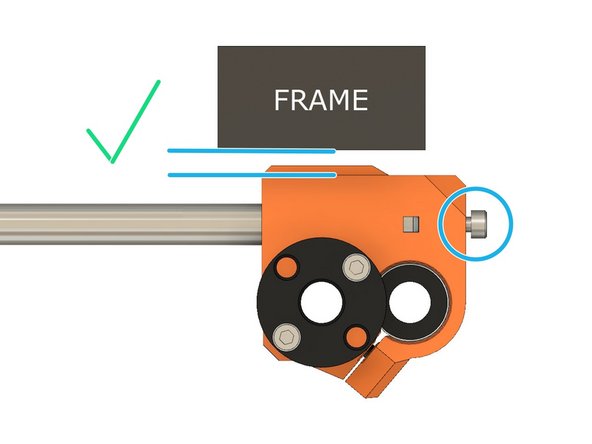
Accommodate both M3x10 screws to have the x_end_idler parallel to the frame.
-
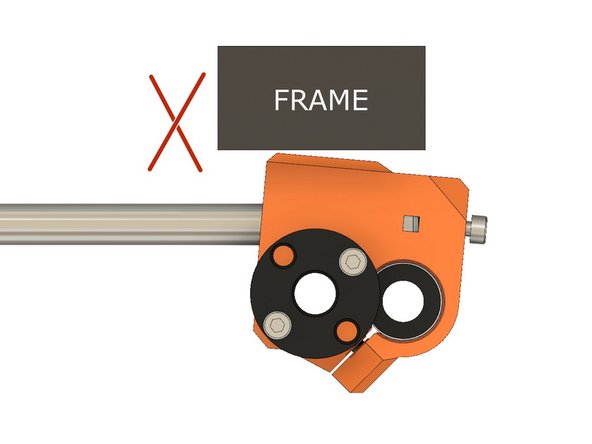
Second image shows when the X axis is too short. In this case you need to tighten the two M3x10 screws.
-
Third image shows when X axis is too long. In this case y'all need to unscrew the ii M3x10 screws.
-
-
-
If yous take difficulty to encounter if the x_end_idler is parallel to the frame you can apply a thick ruler or a foursquare like on the start image.
-
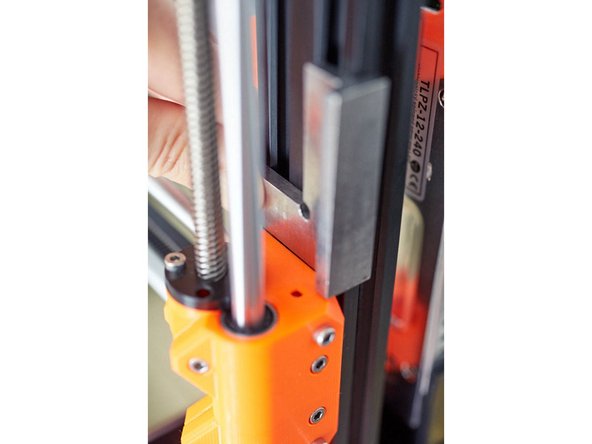
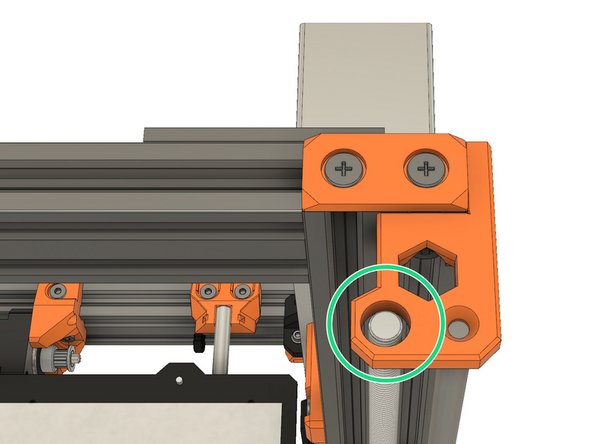
Verify that your Z lead screw is not touching the Z tops holes. If it is touching release the pressure level from the X smoothen rods tensioning screws like explained in the previous footstep.
-
Double check that your belt is still well tensioned. In case it needs adjustment repeat the previous step.
-
-
-
Select and download the latest Acquit calibration firmware hither: github.com/bear-lab-3d/Prusa-Firmware/re...:
-
MK3S Einsy-Rambo 10a firmware proper name: Bear_Cal_FW***_MK3S-EINSy10a.hex
-
MK2.5S Mini-Rambo 13a firmware proper noun: Bear_Cal_FW***_MK25S-RAMBo13a.zip
-
MK2.5S Mini-Rambo 10a firmware name: Bear_Cal_FW***_MK25S-RAMBo10a.zip
-
-
-
Get a USB A to B cablevision.
-
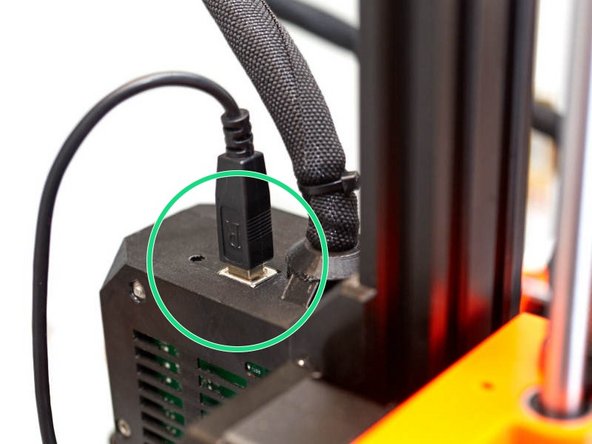
Connect the USB cable on the Mini-Rambo / Einsy-Rambo.
-
Connect the other side of the USB cable to your computer that is running PrusaSlicer.
-
Plough on the printer.
-
-
-
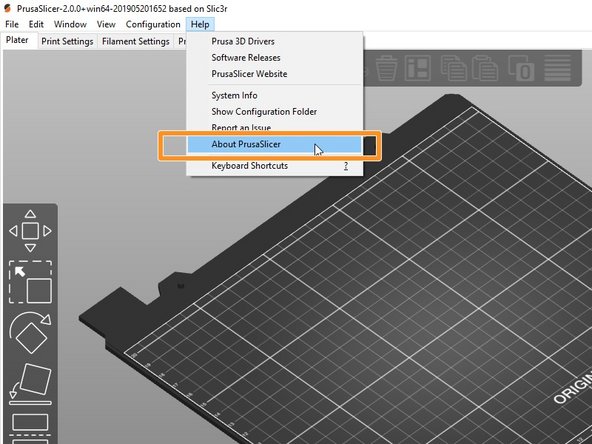
Start PrusaSlicer software and get to the meridian menu Help -> Well-nigh ...
-
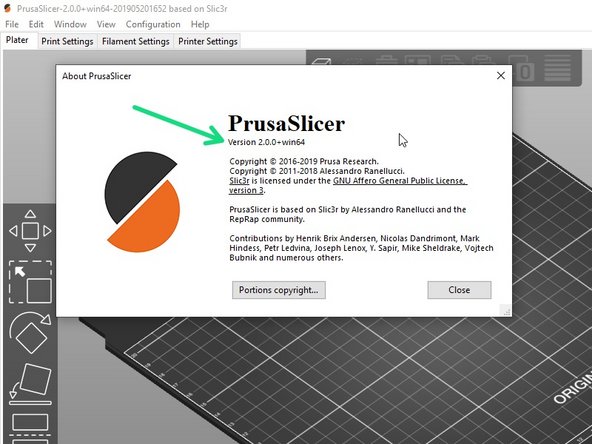
Verify that the slicer version is equal or greater than 2.0.0.
-
If version is equal or greater: go to the next step
-
If your version is lower: download and install the version shown above from this page: prusa3d.com/prusaslicer.
-
-
-
Verify that the printer is turned on.
-
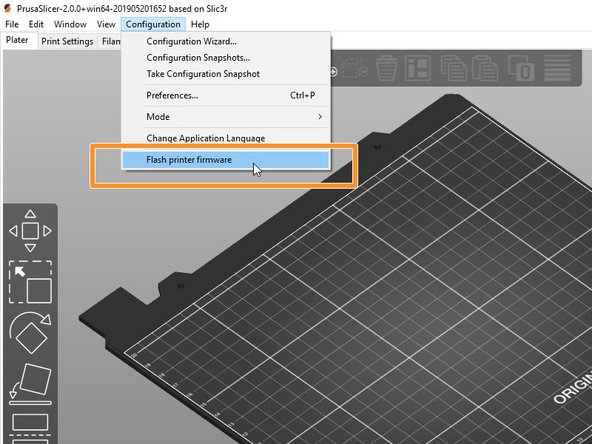
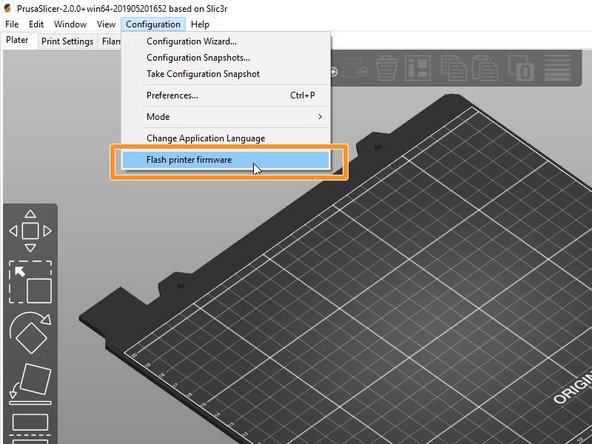
Commencement PrusaSlicer and navigate to the meridian menu Configuration -> Flash print firmware
-
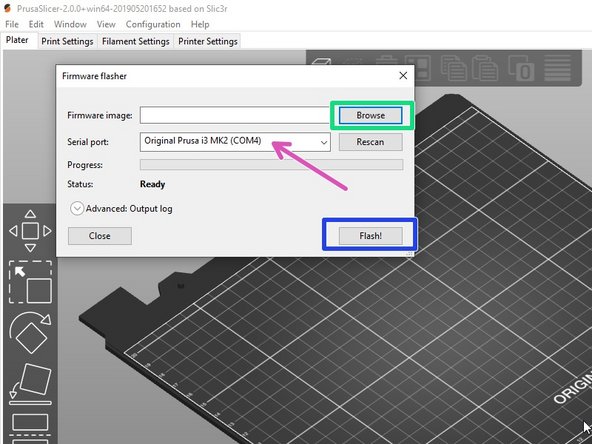
Select the advisable Bear scale firmware *.hex file using the Browse button.
-
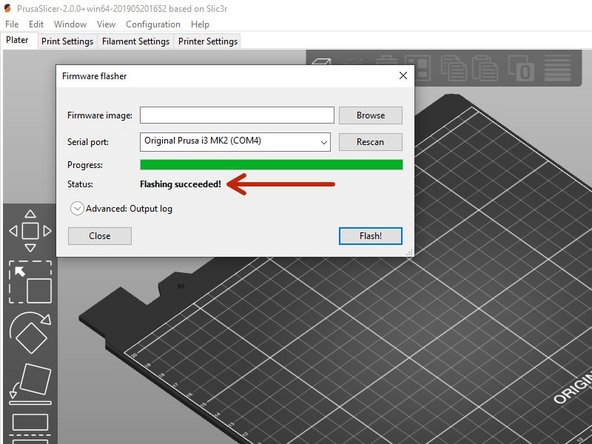
Verify that the printer is detected in the "Serial port:" window. If not, bank check that the USB cable is firmly connected to both the printer and the computer. select "Rescan"
-
Click the button Wink! to flash the Bear calibration firmware.
-
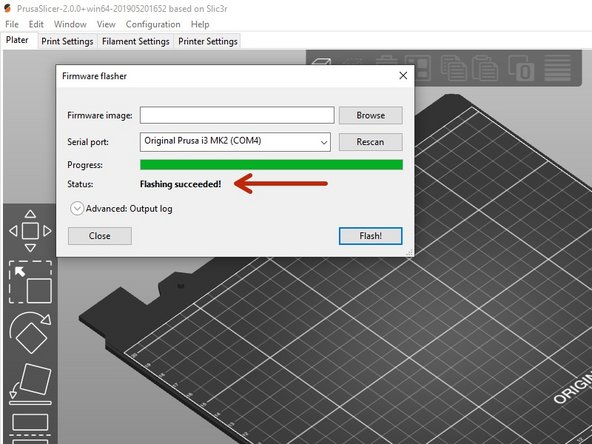
Look until you become a Flashing succeeded! message.
-
-
-
Turn the printer off and and then on.
-
Run the "Selftest" in calibration settings.
-
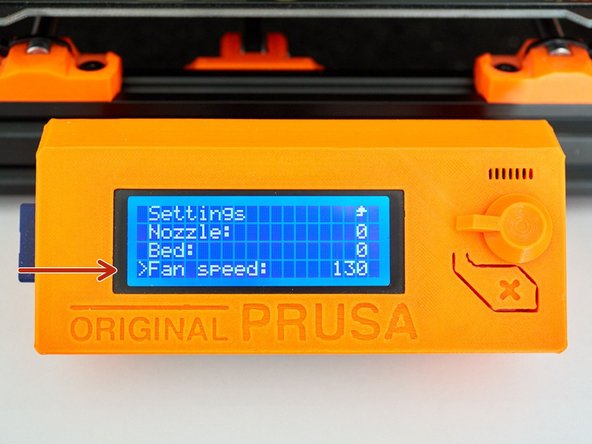
In Settings -> Temperature -> Fan speed set a value at 130 if you print lots of PETG and 255 if yous impress lots of PLA. For other materials select according to your almost used filament.
-
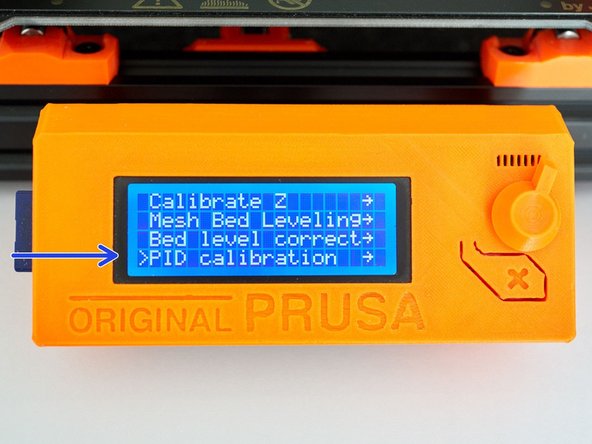
Run PID calibration in calibration settings.
-
Cull a temperature that matches your nigh used printing temperature.
-
-
-
Heat upward the nozzle by selecting Settings -> Temperature -> Nozzle: and insert PLA filament.
-
Make sure you have the steel sheet on the printer.
-
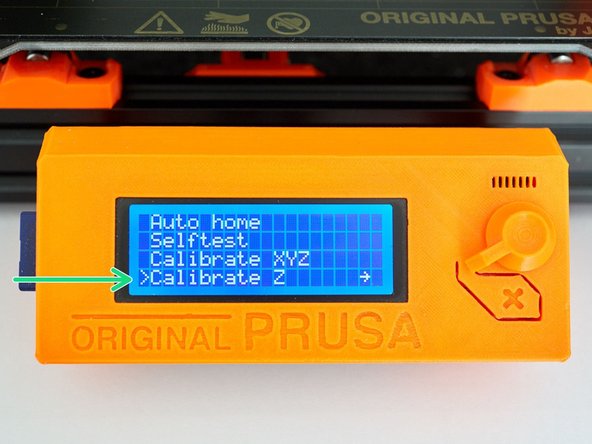
Run Calibration Z. You may repeat the process.
-
-
-
Select and download the latest Prusa firmware here: prusa3d.com/drivers :
-
MK3S Einsy-Rambo 10a firmware proper name: FW_MK3S-EINSy10a.hex
-
MK2.5S Mini-Rambo 13a firmware name: FW_MK25S-RAMBo13a.zip
-
MK2.5SMini-Rambo 10a firmware name: FW_MK25S-RAMBo10a.zip
-
-
-
Verify that the printer is turned on and USB connected.
-
Get-go PrusaSlicer and navigate to the height carte du jour Configuration -> Flash print firmware
-
Select the Bear calibration firmware *.hex file using the Browse button.
-
Verify that the printer is detected in the "Series port:" window. If not, bank check that the USB cable is firmly connected to both the printer and the reckoner. select "Rescan"
-
Click the button Wink! to flash the Bear calibration firmware.
-
Wait until you become a Flashing succeeded! bulletin.
-
-
-
Follow our "Extrusion multiplier" guide hither: eight. Extrusion multiplier and filament bore
-
-
-
Congratulations, you have finished to install and calibrate your Comport extruder.
-
Happy printing :)
-


Embed this guide
Choose a size and copy the code below to embed this guide as a pocket-size widget on your site / forum.
Preview
Source: https://guides.bear-lab.com/Guide/5.+Final+adjustments+and+calibration/14
0 Response to "Calibration Failed Check the Axis Again Prusa"
Publicar un comentario